 |
|
(Click Here for Video Tutorial)
The Dialogue Editor allows you to edit dialogue databases. To open the Dialogue Editor:
You can also use the Dialogue Editor to make changes to dialogue databases created in external authoring tools (e.g., Chat Mapper, articy:draft, and Aurora Toolset), but we recommend you make changes to your originals (e.g, Chat Mapper project) instead. Otherwise you could overwrite your changes the next time you use the converter.
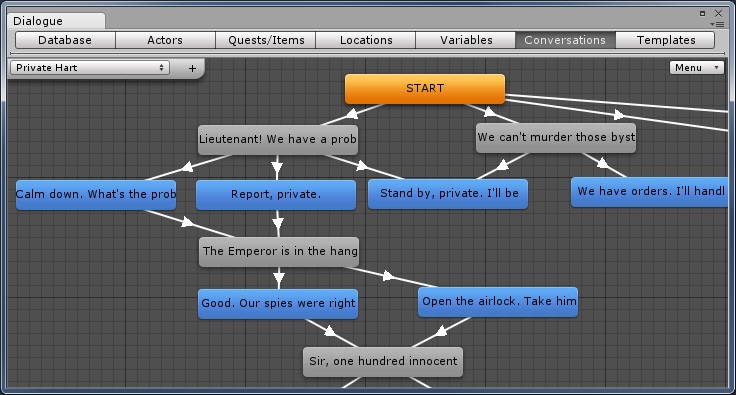
The Dialogue Editor has these tabs:
If you use multiple dialogue databases, you may want to define all of your actors in one database, all of your quests in another, etc. You can then configure a dialogue database to pull assets from these databases. To do this, select Sync From DB in the asset tab's menu. Then select the source database that you want to sync assets from.
You can add more assets, but keep in mind that assets with the same ID as assets in the source database will be overwritten. For example, say you're writing a game where the player travels from planet to planet with a party of companions. You can define the player and companion actors in a source database. Then you can create a separate database for each planet that syncs from this source database and adds actors specific to that planet.
For more information about using multiple dialogue databases, see How To Use Multiple Dialogue Databases.
You can define your own field types with their own custom Dialogue Editor drawers.
To define a new custom field type:
Scripts/Editor/Custom Field Types/CustomFieldType_TemplateType.cs and rename it for your field type. For example, if you want to define a color field type, rename it to CustomFieldType_ColorType.cs. The file must be in an Editor folder or a subfolder.Note: Custom field types are a design-time convenience that allow you to add custom editor drawers. At runtime, all custom fields are treated as Text.
(Thanks go out to Andrei Markov for contributing the original code for custom field types.)