This page describes how to set up the Dialogue System with 2D Action RPG Starter Kit and how to use them together. (2D Action RPG Starter Kit is required.)
2D Action RPG Starter Kit copyright © Cinopt Studios.
2D Action RPG Starter Kit Setup
Follow these steps to set up the Dialogue System with the 2D Action RPG Starter Kit.
- Import the package
Third Party Support/2D Action RPG Starter Kit Support. This will unpack files into the folder Third Party Support/2D Action RPG Starter Kit.
- The rest of these steps are already set up in the included example. Instead of following the remaining steps below, you can just import the example scene package located in
Third Party Support/2D Action RPG Starter Kit/Example/Example Scenes and skip the rest of the steps.
- If you didn't import
Example Scenes, import the package Third Party Support/2D Action RPG Starter Kit/Script Modifications. This will update 2dactionrpg/Scripts/playercurrency.js and playerhealth.js with versions that contain an extra function necessary to synchronize data with the Dialogue System.
- Load the scene
2dactionrpg/Scenes/loader.
- Add a Dialogue Manager (GameObject > Create Other > Dialogue System > Dialogue Manager) or use the Dialogue Manager wizard (Window > Dialogue System > Tools > Wizards > Dialogue Manager).
- (Optional) Move the Dialogue Manager so it's a child of permanentobjects. This is just for organization to remind you that Dialogue Manager is a permanent object.
- Select the Dialogue Manager object.
- Set Initial Database to your dialogue database. If you haven't created one yet, remember to assign this once you've created it.
- Set Display Settings > Dialogue UI to your UI prefab. The example uses the JRPG prefab in
Dialogue System/Prefabs/Unity Dialogue UIs/JRPG, but you can use any of the others or create your own.
- IMPORTANT: Set Display Settings > Camera Settings > Default Sequence to
Delay({{end}}). The initial value of Default Sequence will try to do closeups of the 3D transforms of the actors. Since this is a 2D game, you don't want to control the camera this way.
- Select the permanentobjects/Player object.
- Add these components:
- Component > Dialogue System > Triggers > Show Cursor On Conversation
- Component > Dialogue System > Actor > Player > Proximity Selector
- Component > Dialogue System > Third Party> 2D Action RPG Starter Kit > 2D Action RPG Bridge
- Select the player's ActionRPG2DBridge component.
- Assign permanentobjects/GUI/inventory to the Inventory property.
- If you've added or modified items, expand the Variables list and update the item IDs. By default, they start with "sword", "bow", etc.
- If you want to prevent the player from walking away during conversations, tick Freeze Player During Conversations.
- If you want to include information on whether each line of dialogue has been offered or spoken (which makes saved games bigger), tick Include Sim Status. Otherwise, leave this unticked to save memory.
- Select the Proximity Selector.
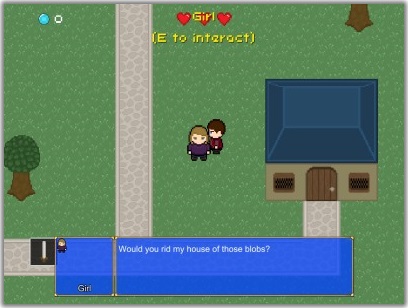
- Set Default Use Message to
(E to interact) or something similar.
- Change the Use Key to E, since the kit already uses Space to attack.
How to Add Conversations
To add a conversation to an NPC or interactive object:
- Expand the NPC's hierarchy and select the talktrigger object.
- Set the tag to
npc.
- Remove the Npctalk component. This is the 2D Action RPG talk component. We're going to replace it with a Dialogue System conversation.
- Add these components:
- Component > Dialogue System > Triggers > Conversation Trigger (or Bark Trigger to bark instead)
- Component > Dialogue System > Triggers > Stop Conversation If Too Far (if the player can move during conversations)
- Component > Dialogue System > Actor > Usable
- If the NPC barks, add a bark UI: Component > Dialogue System > UI > Unity GUI > Bark > Bark UI
- For mobile, consider ticking Cache Bark Lines. This will cache the lines to improve performance but their conditions won't be re-evaluated every bark.
- On the Conversation Trigger:
- Set Conversation to the title of the conversation in the dialogue database.
- Set Conversant to the main NPC GameObject.
- On the Usable component:
- Set Override Name if you don't want to use the name of the main NPC GameObject for the selector.
- In this case, also add an Override Actor Name component to the main GameObject and set the portrait name to be used during conversations if your UI uses portrait names.
How to Access 2D RPG Kit Data
When a conversation starts, the bridge script sets the following Lua variables:
| Variable | Description |
Variable["playerHealth"] | The player's health |
Variable["money"] | The player's gem count |
Variable["slotSet"] | The slot number (1 to 16) of the currently-equipped item |
Variable["sword"] | 1 if the player has a sword, 0 if not |
Variable["bow"] | 1 if the player has a bow, 0 if not |
Variable["wand"] | 1 if the player has a wand, 0 if not |
Variable["potion"] | The number of potions in the player's inventory |
The variables "sword", "bow", etc., will be different if you've changed the list of variables on the player's ActionRPG2DBridge component.
You can check these values in dialogue entry conditions and set them in dialogue entry user scripts. If you set a value during a conversation, at the end of the conversation it will be reflected back into the 2D RPG Kit.
Example Scenes
The example for this integration package uses modified versions of the scenes in 2dactionrpg/Scenes. It provides a menu for saving games, loading games, and viewing the quest log window. The Escape key opens and closes the menu.
To play the example, first import the Example Scenes package. Then play the scene named loader.
The following scenes have been modified for the example:
loader
- Added a Dialogue Manager, including a Quest Tracker.
- Added Dialogue System components to Player.
- Added an Example Menu (under Dialogue Manager) to demonstrate quest windows, saving, and loading.
menu
- Disabled MenuGUI, since there's a new main menu in loader.
playerhouse
town
otherhouse
<< Third Party Support